Hey there! As a supplier of DP Type Density Meters, I often get asked about how to transfer the data measured by these meters to a computer. It's a crucial step for many industries that rely on accurate density measurements for process control, quality assurance, and more. In this blog post, I'll walk you through the process and share some tips to make it as smooth as possible.
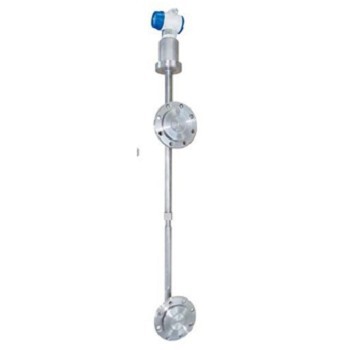
First off, let's understand what a DP Type Density Meter is. It's a device that measures the density of a liquid or slurry by detecting the differential pressure across a known height of the fluid column. These meters are widely used in industries like chemical, food and beverage, mining, and wastewater treatment. If you're interested in different types of density meters we offer, check out our Online Density Transmitter, Online Liquid Density Meter, and Slurry Density Meter.
Now, let's get into the nitty - gritty of data transfer. There are a few common methods to transfer the data from a DP Type Density Meter to a computer.
1. Analog Output
Most DP Type Density Meters come with an analog output, usually in the form of a 4 - 20 mA signal. This is a very standard way of transmitting data in industrial settings. Here's how you can use it to transfer data to a computer:
Step 1: Get an Analog - to - Digital Converter (ADC)
You'll need an ADC to convert the analog 4 - 20 mA signal from the density meter into a digital signal that the computer can understand. There are many ADCs available on the market, with different features and levels of accuracy. Make sure to choose one that is compatible with your computer's interface (e.g., USB, Ethernet).
Step 2: Connect the ADC to the Density Meter
Connect the 4 - 20 mA output of the density meter to the input of the ADC. Follow the wiring instructions provided with both the density meter and the ADC carefully. Incorrect wiring can lead to inaccurate readings or even damage to the equipment.
Step 3: Connect the ADC to the Computer
Once the ADC is connected to the density meter, connect it to your computer using the appropriate cable (e.g., USB cable). Install the necessary drivers for the ADC on your computer. These drivers will allow your computer to communicate with the ADC and receive the digital data.
Step 4: Use Data Acquisition Software
You'll need some data acquisition software to collect, display, and analyze the data. There are many off - the - shelf software packages available, and some ADC manufacturers also provide their own software. Install the software on your computer and configure it to communicate with the ADC. You should be able to see the density readings from the meter on your computer screen.
2. Digital Communication Protocols
Many modern DP Type Density Meters support digital communication protocols such as Modbus, Profibus, or HART. These protocols offer several advantages over analog output, including higher accuracy, better noise immunity, and the ability to transfer multiple parameters at once.
Step 1: Check Compatibility
First, make sure that your density meter supports the digital communication protocol you want to use. Also, check if your computer has the necessary hardware and software to communicate using that protocol. For example, if you're using Modbus RTU, you'll need a Modbus RTU adapter to connect your computer to the density meter.
Step 2: Configure the Density Meter
Configure the density meter to use the chosen digital communication protocol. This usually involves setting parameters such as the baud rate, slave address, and parity. Refer to the user manual of the density meter for detailed instructions on how to do this.
Step 3: Connect the Density Meter to the Computer
Connect the density meter to your computer using the appropriate cable and adapter. For example, if you're using Modbus TCP, you can connect the density meter to your local network and access it from your computer over the network.
Step 4: Use Communication Software
Install communication software on your computer that supports the chosen digital communication protocol. This software will allow you to establish a connection with the density meter, read the data, and perform other operations such as configuration and calibration.
3. Wireless Data Transfer
In some cases, wireless data transfer can be a convenient option, especially if the density meter is located in a hard - to - reach area or if you want to avoid running cables.

Step 1: Choose a Wireless Module
Select a wireless module that is compatible with your density meter. There are several types of wireless technologies available, such as Wi - Fi, Bluetooth, and ZigBee. Consider factors like range, data transfer rate, and power consumption when choosing a wireless module.
Step 2: Install the Wireless Module
Install the wireless module on the density meter according to the manufacturer's instructions. This may involve connecting the module to the meter's communication port and configuring it to work with the chosen wireless network.
Step 3: Connect to the Computer
On your computer, make sure that it has the appropriate wireless adapter and that it is connected to the same wireless network as the density meter. Install software on your computer that can communicate with the wireless module and receive the data from the density meter.
Tips for Successful Data Transfer
- Calibration: Before starting the data transfer, make sure that the density meter is properly calibrated. An uncalibrated meter can give inaccurate readings, which will be transferred to the computer and can lead to incorrect decisions.
- Data Validation: Implement data validation techniques in your data acquisition software. This can help you detect and correct any errors or outliers in the data. For example, you can set limits on the acceptable range of density values and flag any readings that fall outside these limits.
- Regular Maintenance: Keep your density meter and the data transfer equipment in good working condition. Regularly check the wiring, connections, and software for any issues. Replace any worn - out components as needed.
If you're in the market for a DP Type Density Meter or need help with data transfer, don't hesitate to reach out. We're here to provide you with the best products and support to meet your needs. Whether you're a small - scale operation or a large industrial facility, we can offer customized solutions for your density measurement and data transfer requirements. Contact us to start a procurement discussion and take your density measurement processes to the next level.
References
- Industrial Instrumentation Handbook. Various authors.
- Manufacturer's user manuals for DP Type Density Meters, ADCs, and communication modules.


