As a supplier of Oval Gear Flowmeters, I understand the importance of providing clear guidance on installation processes. In this blog post, I'll walk you through the step-by-step process of installing an Oval Gear Flowmeter, ensuring you can get the most accurate and reliable flow measurements for your applications.
Pre-Installation Preparation
Before you start the installation process, it's crucial to make some preparations. First, ensure that you have all the necessary tools on hand. These typically include wrenches, pipe cutters, Teflon tape, and a level. You'll also need to gather all the components of the Oval Gear Flowmeter, including the flowmeter itself, gaskets, and mounting brackets.
Next, carefully select the installation location. The Oval Gear Flowmeter should be installed in a straight section of the pipeline, away from any elbows, valves, or other flow-disturbing elements. This helps to ensure a stable and uniform flow profile, which is essential for accurate measurements. The recommended straight pipe length upstream of the flowmeter is at least 10 times the pipe diameter, and downstream, it should be at least 5 times the pipe diameter.
Pipeline Preparation
Once you've chosen the installation location, it's time to prepare the pipeline. Start by shutting off the flow in the pipeline and relieving any pressure. Use a pipe cutter to cut the pipeline at the appropriate location, making sure the cut is clean and straight. Remove any burrs or debris from the inside of the pipe using a deburring tool.
Measure the inside diameter of the pipeline to ensure it matches the size of the Oval Gear Flowmeter. If necessary, use a pipe expander or reducer to adjust the pipe size. Wrap Teflon tape around the male threads of the pipe connections to create a tight seal.
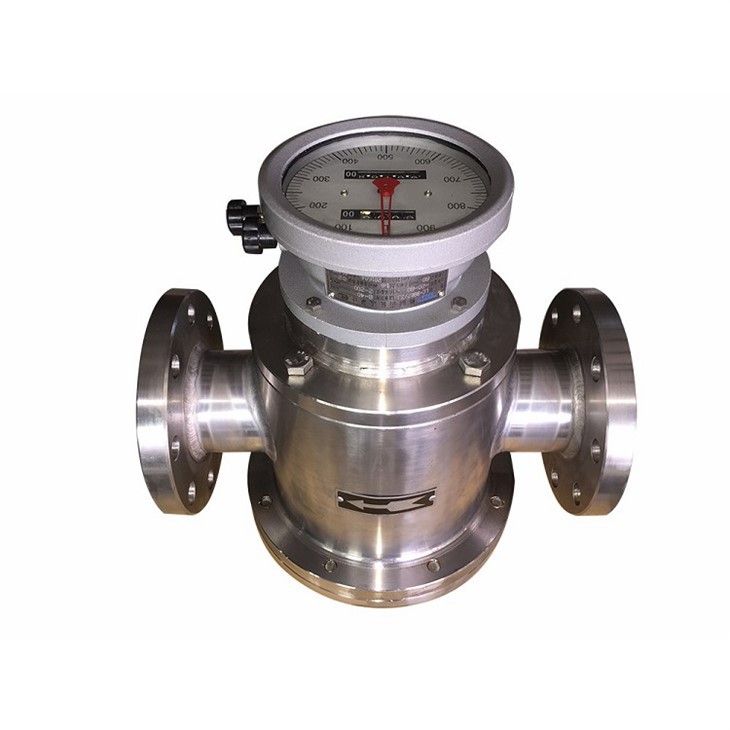
Mounting the Flowmeter
Now it's time to mount the Oval Gear Flowmeter. Place the gaskets on both ends of the flowmeter, ensuring they are centered and properly aligned. Carefully insert the flowmeter into the pipeline, making sure it is straight and level. Use the mounting brackets to secure the flowmeter to the pipeline, following the manufacturer's instructions.
Tighten the bolts on the mounting brackets evenly, using a torque wrench to ensure the correct torque is applied. Over-tightening can damage the flowmeter or the pipeline, while under-tightening can result in leaks.
Connecting the Piping
Once the flowmeter is mounted, it's time to connect the piping. Attach the upstream and downstream piping to the flowmeter using the appropriate fittings. Make sure the connections are tight and leak-free. You can use a pressure test to check for leaks after the installation is complete.

Electrical Connections
If your Oval Gear Flowmeter is equipped with electrical components, such as a transmitter or a display, you'll need to make the electrical connections. Follow the manufacturer's wiring diagram to connect the power supply, signal output, and any other electrical connections. Use proper electrical connectors and ensure all connections are secure.
Calibration and Testing
After the installation is complete, it's important to calibrate and test the Oval Gear Flowmeter. Refer to the manufacturer's instructions for the calibration procedure. This typically involves adjusting the flowmeter settings to match the specific characteristics of your application, such as the fluid type, temperature, and pressure.
Once the calibration is complete, perform a test run to ensure the flowmeter is functioning properly. Monitor the flow rate and other parameters to make sure they are within the expected range. If you encounter any issues during the test run, refer to the troubleshooting guide in the manufacturer's manual or contact our technical support team for assistance.
Maintenance and Care
To ensure the long-term performance and reliability of your Oval Gear Flowmeter, it's important to perform regular maintenance and care. This includes cleaning the flowmeter periodically to remove any debris or contaminants that may accumulate inside. You should also check the gaskets and seals for signs of wear or damage and replace them as needed.
In addition, it's a good idea to have the flowmeter calibrated regularly to ensure accurate measurements. The calibration frequency will depend on the specific application and the manufacturer's recommendations.
Conclusion
Installing an Oval Gear Flowmeter requires careful planning, preparation, and attention to detail. By following the steps outlined in this blog post, you can ensure a successful installation and accurate flow measurements. Oval Gear Flow Meter For Diesel and Oval Gear Flowmeter for Diesel Oil are two of our popular products that offer high accuracy and reliability for diesel applications.
If you have any questions or need further assistance with the installation of an Oval Gear Flowmeter, please don't hesitate to contact us. Our team of experts is always ready to help you with your flow measurement needs. Whether you're looking to purchase a new flowmeter or need support with an existing installation, we're here to provide you with the best solutions.
References
- Manufacturer's Installation Manual for Oval Gear Flowmeters
- Industry Standards for Flowmeter Installation and Calibration


